How to improve the precision of Deep groove ball bearing mounting
After the Deep groove ball bearing is installed in the host, there is a measurement index called cyclic rotation accuracy. This change approximates the number of revolutions needed to repeat the cycle of rotational accuracy "quasi-period", in the quasi-period of the value of the change in the magnitude of the large, that is, the cycle of poor rotational accuracy. When the Deep groove ball bearing spindle with appropriate preload, which can gradually increase the speed to close to the working speed, in order to implement the bearing "grinding" role, can improve the cycle of the spindle rotational accuracy.
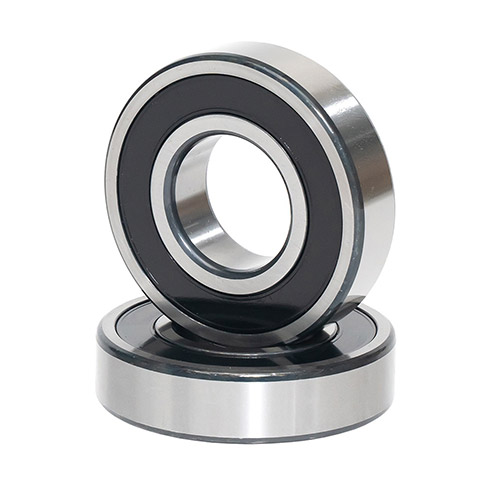
There is a precision instrument to improve the precision of Deep groove ball bearings. When the spindle with 6202 / P2 type bearings, however, its precision still can not meet the requirements, after thickening the journal and in its production of raceway to replace the inner ring, and the steel ball for precision measurement, to size every three grain group, each group of steel ball to take close to 120 ° interval apart, due to the reduction of a heavy processing surface, and reduce a heavy with the surface, but also to improve the rigidity of the shaft a bearing system, and the largest three grain The distribution of the maximum three and minimum three steel balls is close to the same distance, which improves the rotation accuracy of the shaft and thus meets the accuracy requirements of the instrument.
Now specifically introduce the Deep groove ball bearing installation accuracy of the comprehensive verification method, first of all, the angular contact ball bearing into the spindle of the Deep groove ball bearing, the installation accuracy of the verification to go through the following four steps.
(1) Measure the size of the shaft and bearing housing hole to determine the fit accuracy of the bearing. The inner ring and shaft take interference fit, and the outer ring and bearing housing hole take clearance fit.
(2) fixed end before the bearing on the shaft installation: the bearing with clean cleaning kerosene for thorough cleaning, and then use the oil gun to fill the quantitative grease into the bearing; heating the bearing so that the temperature rise 20 ~ 30 ℃, with oil press the bearing into the shaft end; will be pressed on the shaft and with the appropriate pressure against the bearing end face to make its axial positioning; the spring scale tape rolled in the bearing outer ring, with the method of measuring the starting torque Calibrate the specified preload to see if there is a large change.
(3) the Deep groove ball bearing - shaft assembly into the seat hole: heating the seat hole so that the heating 20 ~ 30 ℃, with continuous gentle pressure to the bearing - shaft assembly into the seat hole; adjust the front cover to the outer surface of the bearing seat as a reference, the micrometer head against the surface of the journal, the shaft will be rotated to measure its runout, the micrometer positioned on the shaft, the head against the shaft. The gauge head is touched against the inner surface of the back seat hole, and the shaft is rotated to measure the coaxiality of the front and rear seat holes of the bearing housing.
(4) Selectively place the free end bearing in a position where it is possible to offset the deviation and install it in the bearing housing rear support position to offset the mutual roundness deviation and coaxiality deviation as much as possible.
Measure the actual fit accuracy of the Deep groove ball bearing installation. At this time must use professional measuring methods and measuring tools, the bearing bore and outer circle of the fit surface size of the actual precision measurement, the measurement of the inner diameter and outer diameter of all items to be measured, and the measured data to make a comprehensive analysis. Based on this, the dimensions of the bearing mounting parts of the shaft and the seat bore are precisely matched.
The actual measurement of the corresponding size and geometry of the mated shaft and bore should be performed under the same temperature conditions as the bearing measurement. To ensure a high actual fit, the roughness of the surfaces of the shaft and seat bore mating with the bearing should be as small as possible. In the measurement should be on the outer and inner bore of the bearing, as well as the corresponding surface of the shaft and seat hole, in close to the assembly chamfer on both sides, respectively, to show the maximum deviation direction of the two sets of marks, so that in the actual assembly, so that the maximum deviation of the two sides of the match aligned with the same orientation, so that after the assembly, the deviation of both sides can be partially offset. When the compensation of deviation is considered, the rotation accuracy of each end bearing is improved, and the coaxiality error of the seat hole and the two end journals between the two bearings is partially eliminated.
The above is the knowledge about how to improve the precision of Deep groove ball bearing installation, if you need more detailed understanding, welcome to contact us!


